

5 reasons good wall preparation is key in hygienic wall cladding installs
When planning your hygienic wall cladding project, good wall preparation is crucial because it impacts the entire success of the project - the durability, appearance, and performance of the cladding system. Here are the key reasons why proper wall preparation is essential:
1. Ensures adhesion
Hygienic wall cladding relies on strong adhesion to the substrate. Any dust, grease, or loose particles on the wall can prevent the adhesive from bonding effectively, leading to peeling or detachment over time. The walls need to be warm and dry too, for the adhesive to work properly.
2. Provides a smooth surface
Uneven or rough surfaces can cause imperfections in the cladding installation. Preparing the wall (e.g., filling cracks and smoothing out bumps) ensures the cladding lays flat and maintains a professional, clean appearance.
3. Prevents contamination
Hygienic wall cladding is often used in environments requiring high levels of cleanliness, such as kitchens, health care settings, bathrooms and food manufacturing areas. Proper wall preparation eliminates contaminants like mould, dirt, and bacteria, ensuring the installation meets hygiene standards.
4. Increases longevity
A well-prepared surface reduces the risk of future problems like bubbling, warping, or detachment. This helps maintain the structural and aesthetic integrity of the cladding over time. Products such as Altro’s Whiterock come with a 25 year warranty - but only if installed in the right conditions. Don’t cut corners and you’ll be sure to get the most out of your investment by prepping well.
5. Efficient installation
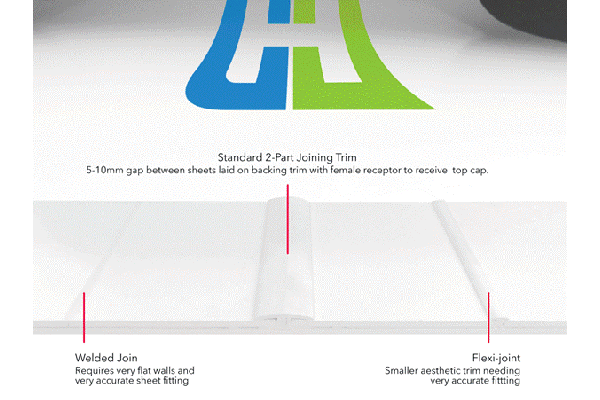
A properly prepared wall makes the installation process faster and more efficient. Installers can turn up on site to do what they’re paid to do - apply the adhesive and cladding with minimal interruptions or adjustments, saving time and resources. If the walls are not prepared properly, our installers may not be able to weld the sheets, if this is your desired finish.
Key wall preparation requirements:
-
All surfaces must be smooth, sound, dry and free of contamination.
-
They must be structurally sound and free from contamination, friable materials or laitance.
-
All surfaces must be free from grease.
-
Where necessary, the walls should be cleaned down prior to the Hycom sheet installation.
-
Sometimes a primer is required. Primers vary but standard wall preparation is 10 parts water to 1 part PV.
Lay the foundations for success
No doubt you’ve been planning on how to create your hygienic setting for some time, investing time, resources and money into the project. By putting time and effort in wall preparation, you can ensure a successful installation and long-lasting performance of hygienic wall cladding. For more advice, get in touch with our team.